How To Setup OpenVPN on Kodi

If you don't have Kodi installed you can download it from here

If you'll be using Kodi on FireTV stick from Amazon please ignore this guide and visit our "FireTV Stick" guide.

You must start Kodi with "sudo" command on Linux or if you're on Windows you must "Run it as Administrator". On Windows you can do this with right-click -> Run as Administrator.


Step 1

On your computer download the configuration file:


Now navigate to the file location and unzip it. You should now see a directory called "OpenVPN-Configs" at the location where you unzipped the file. If you don't see such directory then create one and extract the contents of OpenVPN-Configs.zip inside.

Now you must put the "OpenVPN-Configs" directory on a USB or shared network drive which is connected to the device that runs Kodi, unless you're running it locally on the same computer.


Step 2

On your computer download the "Zomboided" add-on (zip file) from the GitHub page (click here)
It's a VPN Manager Add-on which is pre-configured with the necessary VPNArea settings.


Place the downloaded zip file on a USB and plug it into the device or alternatively place it on a shared drive which the device has access to.

Then on the device navigate to "System -> Add-ons -> Install from ZIP File" and select the downloaded ZIP file. Zomboided VPN Manager will now be installed.


Step 2.1

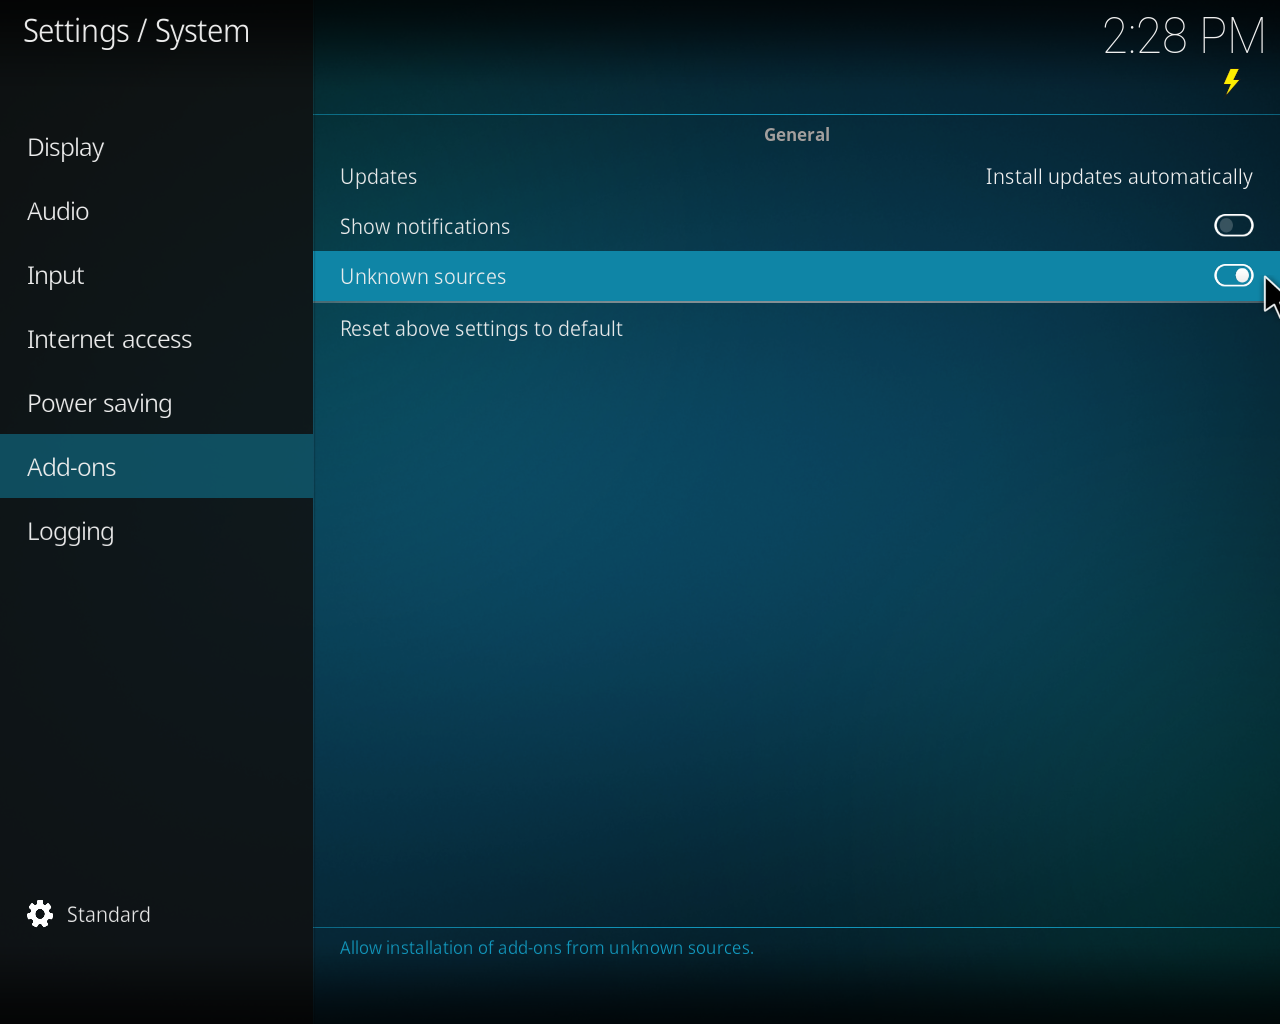
If you see the error "Disabled - For security, installation of add-ons from unknown sources is disabled." then go to:
"Settings/System -> Add-ons -> Unknown Sources" and enable that option and confirm when asked.
Now retry installing as instructed in Step 2.


Step 3

Go to "System" -> Settings


Step 4

Click on Add-ons and then "Install from Repository"

Step 5

Now select the Zomboided Add-on repository which we installed in Step 2


Step 6

Click "Services" and then you will see "VPN Manager for OpenVPN", click it.

Step 7

Select Install in "VPN Manager for OpenVPN"

Step 8

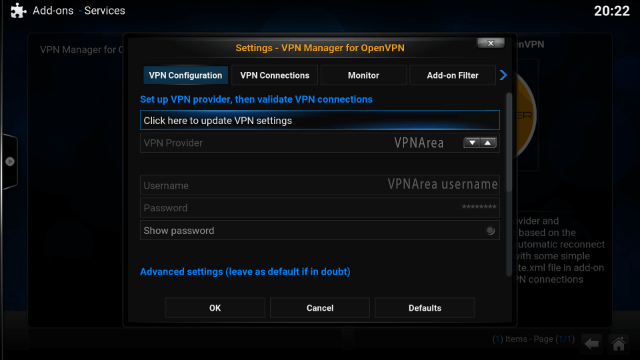
Once installed click "Configure" -> "Cick here to update VPN settings".

Step 9

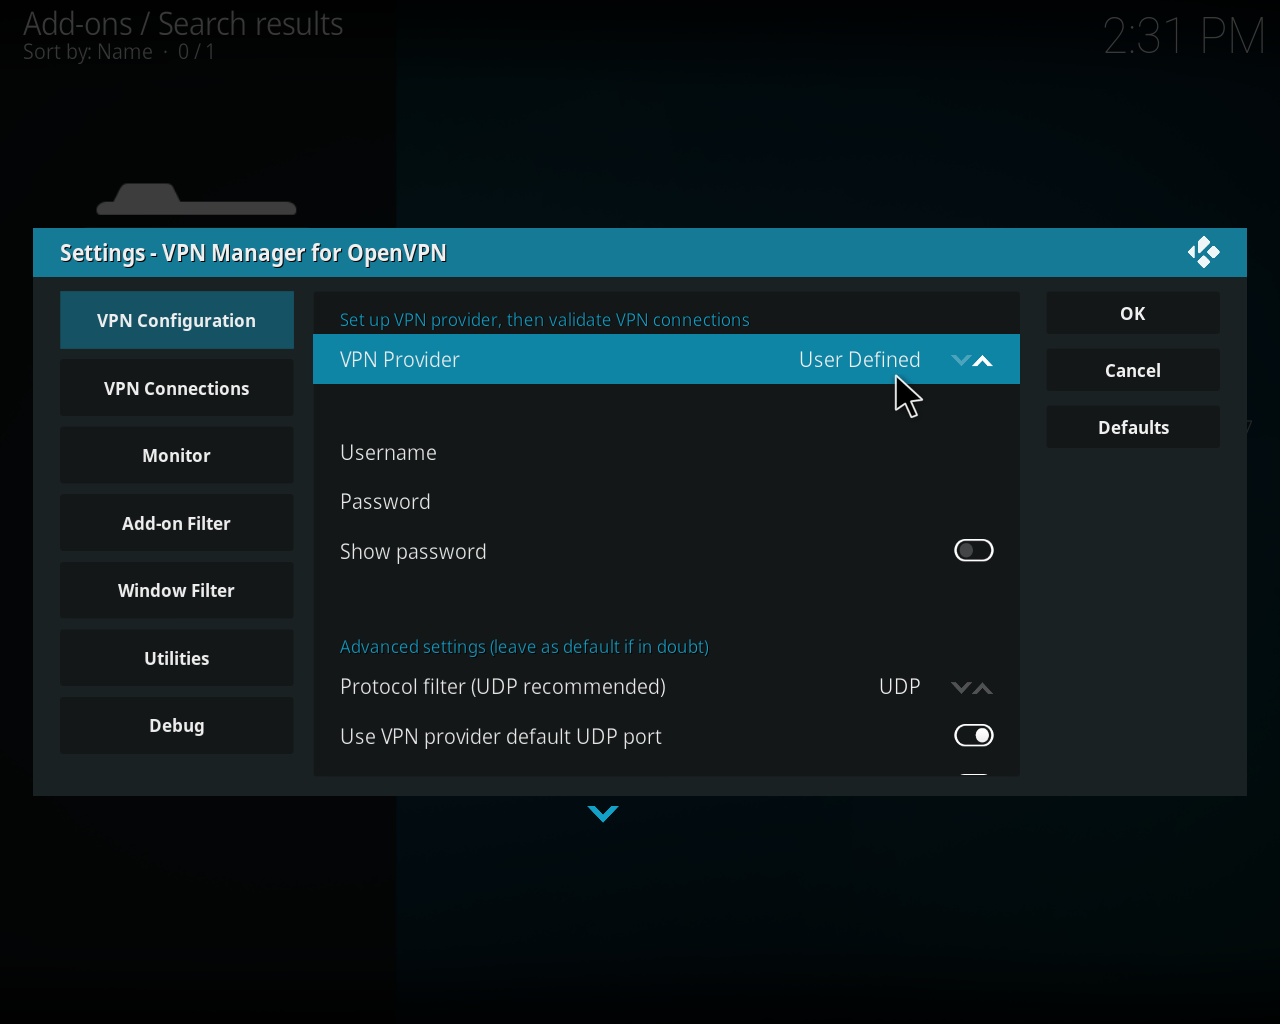
VPNArea is available in the VPN Providers list but we recommend to instead choose "User Defined" so that you can use the latest version of our servers list. Click "User Defined" in the "VPN Provider" menu and enter your VPNArea Username (not email) and Password

Step 10

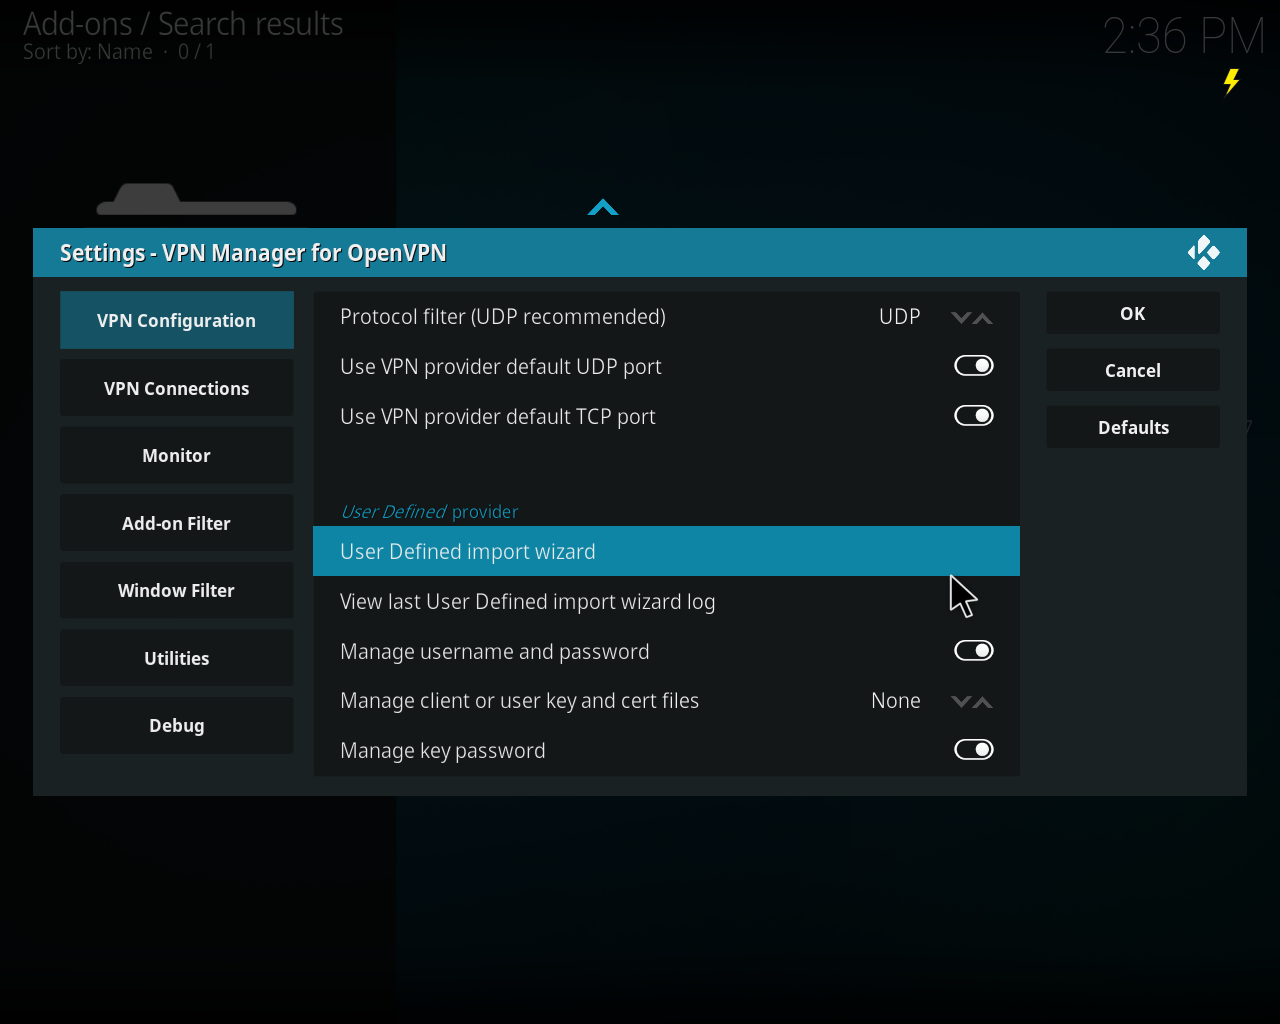
Scroll down and click "User Defined Import wizard"

Step 12

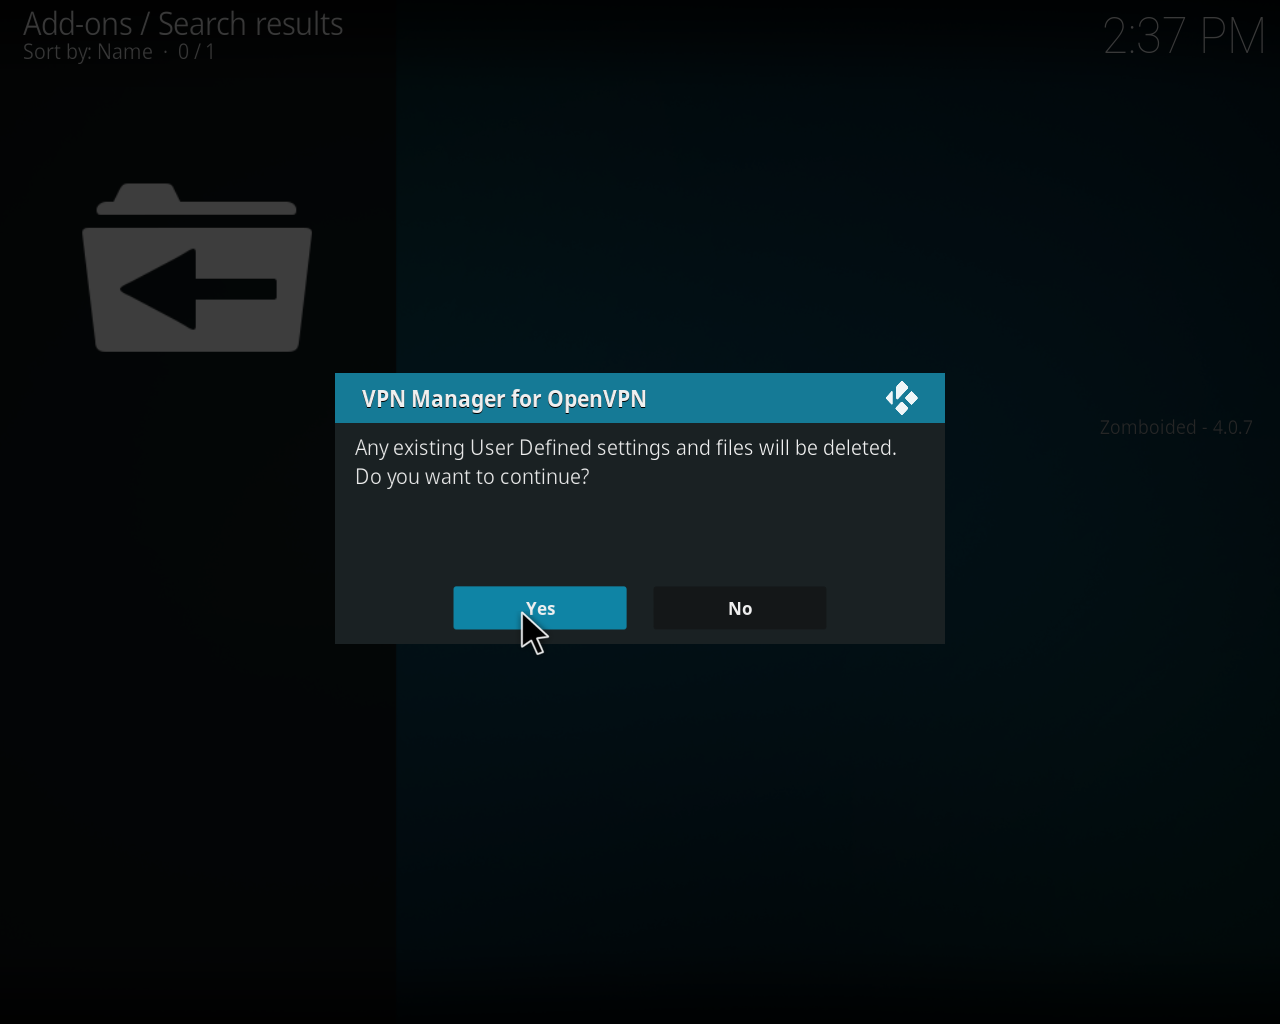
Click "Yes" to the warning that existing User Defined settings will be deleted.
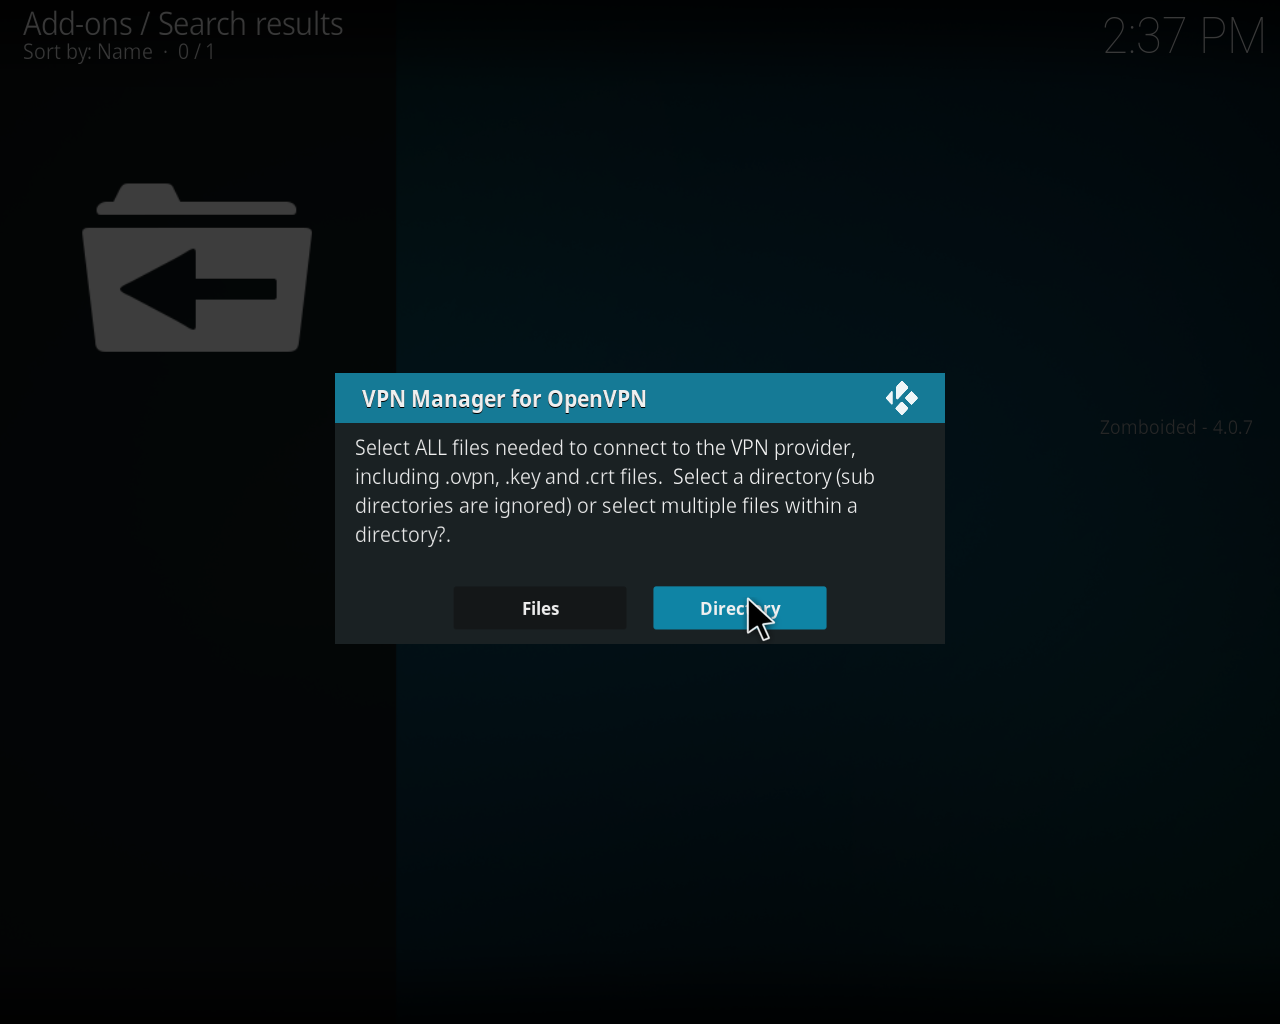
Then click "Directory" when asked how do you want to import the profiles.
Then navigate to the OpenVPN-Configs directory and import it. If you're asked if you want to modify the files click "Yes"

Step 13

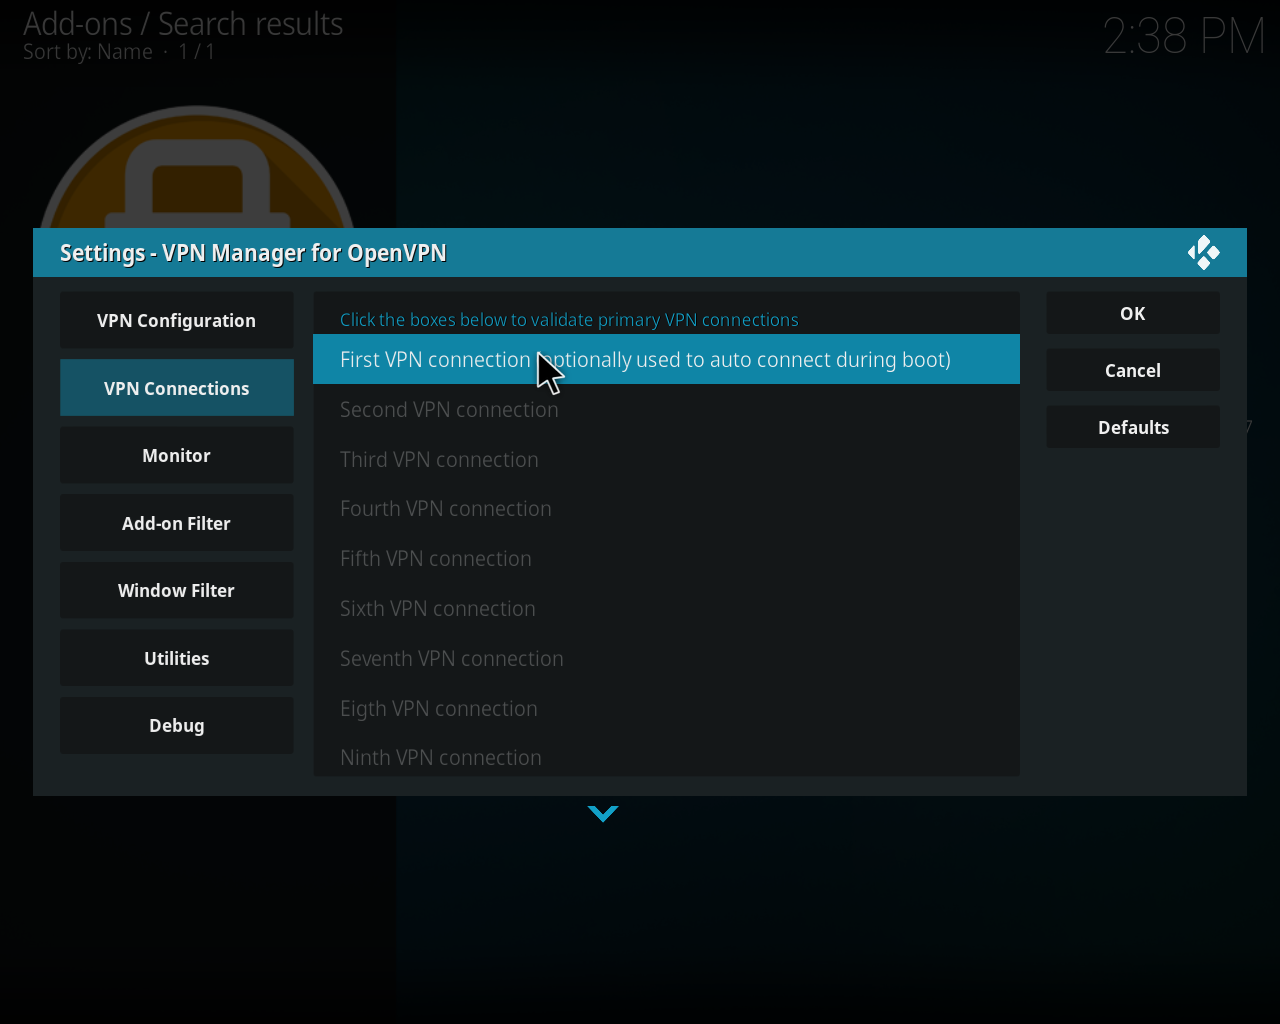
Click "First VPN Connection" and select one of the VPNArea server profiles. This will be the server you'll automatically connect to on boot.


All done

That's it, you will now be connected. If you wish to change the server just go to "VPN Manager" -> Settings -> VPN Connections and choose a different server.